I am on a ROLL! How many posts have I done this week? THREE!! And this is the FOURTH! woohoo! Hopefully people are still reading my blog, and not coming here solely from pinterest... Though I am greatful to all those who have pinned my blog and keep people reading it! One day I will decide to make more money off this thing using those stats. Speaking of, any of you want an ad on my blog? I'm thinking $10/month same size as those on the right. I get usually 11,000 hits/month!
Email me if you are interested. Now's the time, its the holidays!
Okay, on to today's little inspiration station.
Pom-poms and such.
The jumper. It was a hand-me down of course, and so I was excited to re-vamp it. I bought some strung pom-poms at Jo Ann's and just pinned and sewed them straight to the hem of the jumper. Done.
The leggings I spotted on Pinterest and knew immediately that I had to make some knock-offs! She has worn them for three days now bc I think they look cute with everything.
The top, which you can't really see, is just a plain shirt that I sewed a cut-in-half doily onto the shoulders of.
The shoes, again can be found here (tutorial).
And there you have it. Living vicariously through my children with their wardrobe. While they still let me!
Showing posts with label while you were napping projects. Show all posts
Thursday, November 8, 2012
Thursday, October 25, 2012
The Frances Collar Tutorial!
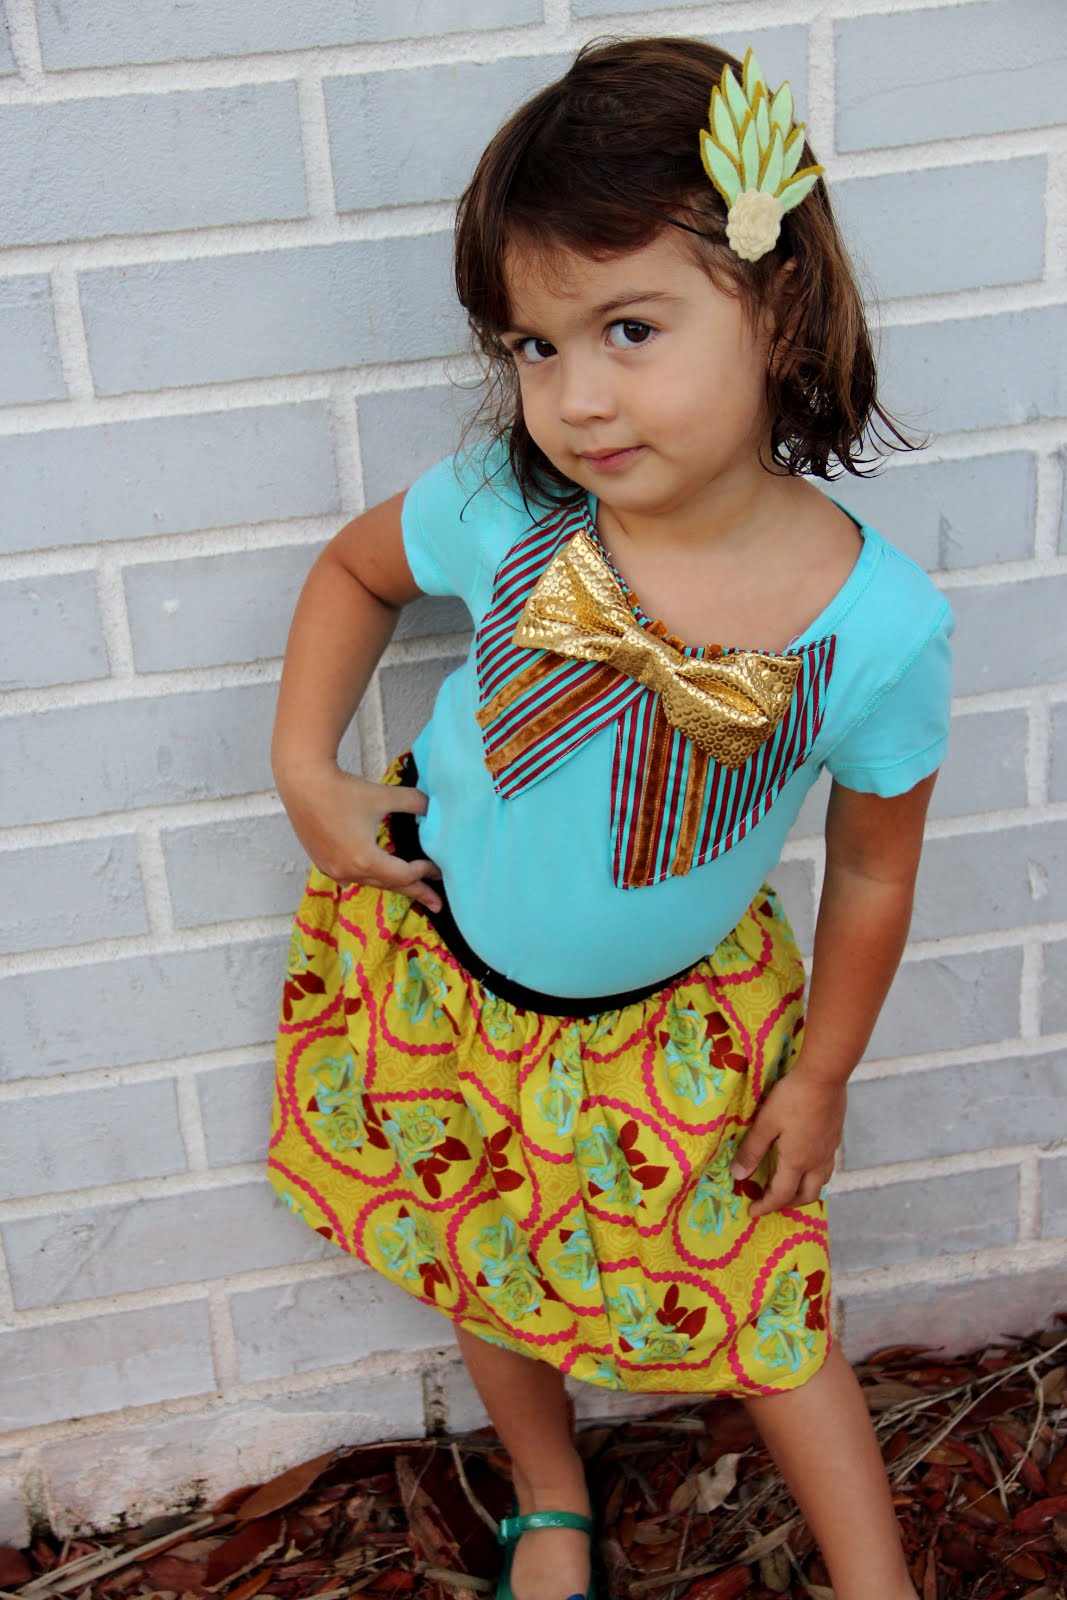
(Olivia insisted on wearing that clip even though I know its a little much with the shirt....)
My little cutie-pies have a lot of plain shirts that need to be snazzed up, so I came up with this faux-collar recently. You can check out the full tutorial (and pattern) for this "collar" over at Leafy Tree Top Spot for her TOP-TOBERFEST (there are lots more great top-re-do's over there!) Go check it out!
(P.S. Amélie's shoes were made using this tutorial)
Tuesday, October 16, 2012
Baby Boys (and girls!): Newborn shirt re-do
When I get ready for a new baby, I make a lots of new clothes, blankets, and room decor. In order to get more bang for my buck (which is more about time than $$), I like to take existing (hand-me downs usually) clothes and just put a new twist on them. You can see this on the following girl and boy tutorials:
BOY PANTS, BOY'S Oxford shirt re-vamp, Girls herringbone leggings, French dotted baby shoes, Tuxedo dress, and many more!!
Why? It takes less time, and I can still feel like their clothes have a special "Katie" touch to them! Then I can spend more time making special pieces later. And in that spirit, here is my latest "Preparing for baby BOY??!!" shirt re-vamp tutorial. Its easy! Its fast! DO IT!
What did I do exactly? I added bias tape to the top of the shirt, and velcro for better coverage/ less weird bunching. (And I dyed the green one obviously!)
Materials:
-kimono tops from the hospital (I had these from my 2nd baby's birth) or I believe carters and gerber make them too...
-bias tape (I used single fold, but just use whatever you have that will cover the original shirt trim.)
-sew-on velcro--about 1- 1.5 inches.
-RIT dye (if you want to dye it first)
(YOU CAN DYE IT FIRST IF YOU LIKE--see my tips for dyeing here)
1. pin the bias tape around the existing hem of the shirt, making sure to tuck under the raw edge of the bias tape at the ends.
2. Top stitch it to the shirt 2 times, as you can see in the above photo. Be careful as you go around any snaps you are covering!
3. I find these newborn kimonos to be frumpy and easily disheveled, so I added velcro for stability. Make sure you bring it in from the edge, so that now velcro edges will touch the baby's skin and irritate it!
And that's all folks! An easy newborn shirt for boys (or girls!)
BOY PANTS, BOY'S Oxford shirt re-vamp, Girls herringbone leggings, French dotted baby shoes, Tuxedo dress, and many more!!
Why? It takes less time, and I can still feel like their clothes have a special "Katie" touch to them! Then I can spend more time making special pieces later. And in that spirit, here is my latest "Preparing for baby BOY??!!" shirt re-vamp tutorial. Its easy! Its fast! DO IT!
What did I do exactly? I added bias tape to the top of the shirt, and velcro for better coverage/ less weird bunching. (And I dyed the green one obviously!)
Materials:
-kimono tops from the hospital (I had these from my 2nd baby's birth) or I believe carters and gerber make them too...
-bias tape (I used single fold, but just use whatever you have that will cover the original shirt trim.)
-sew-on velcro--about 1- 1.5 inches.
-RIT dye (if you want to dye it first)
(YOU CAN DYE IT FIRST IF YOU LIKE--see my tips for dyeing here)
1. pin the bias tape around the existing hem of the shirt, making sure to tuck under the raw edge of the bias tape at the ends.
2. Top stitch it to the shirt 2 times, as you can see in the above photo. Be careful as you go around any snaps you are covering!
3. I find these newborn kimonos to be frumpy and easily disheveled, so I added velcro for stability. Make sure you bring it in from the edge, so that now velcro edges will touch the baby's skin and irritate it!
And that's all folks! An easy newborn shirt for boys (or girls!)
Tuesday, September 18, 2012
Reconstructed Boy Pants: DIY
The finished product. Not quite as cool as the pants below (which are about $60 each), but if you are short on time and have a stash of hand-me-down boy clothes (or girl!!), here is a quick and easy way to give those basic baby pants a little character.
links to these and more boy ideas found here. P.S The above pants/leggings could also be easily made from scratch, but this is the revamp-your-hand-me-downs version.

Materials needed:
some basic cotton pants
stitch ripper
fabric similar to the pre-existing pant
1.fold your pants in half and cut at an angle (or straight across)
2.Fold your new fabric in half and cut 2 of the same shape as you just cut off the old pants. MAKE SURE YOU ADD IN A SEAM ALLOWANCE for all 4 sides, and extra for the bottom, which you will be rolling up (see the image in #3?--that shows the difference in size for the one I cut off and the one that will be replacing it).
3. see above
4. Use your stitch ripper to undo about an inch of stitches up the inside seam of the existing pants' legs.
5. fold and pin the bottom of your new pant leg bottoms so they equal the same size as the old piece you cut off and top-stitch the cuff (one line across the top of the cuff, and one across the bottom).
6. pin right sides together and sew the new pant leg, but don't close up the leg on the inseam. (see below #7).
7. You see how we left those inseams open? Now turn the entire pair of pants inside-out and sew up the new inseam so that everything lines up. Clip your strings and you are finished!
Pin it! Do it! Woo hoo! We can make baby boy clothes cool too!!
Wednesday, August 22, 2012
Brightly colored projects in the making.
I haven't been that good at blogging, and so for the sake of having something to post, I decided to grab my iPad and snap a few shots of things I've been working on lately.
Above is the first side of a quilt I am making for bebe boy. I kept it simple so I could A. actually finish it B. actually finish it. I also used it to determine the color scheme for his room, which I hope I don't change my mind about in the next few months. Luckily I have 7 different colors in there, so I should be good (most of you might be wondering if I actually had a color scheme or just threw a bunch of colors on there and called it a day. I promise this was very thought out--and slightly determined by the fabric that was on sale at JoAnn's...). I am winging it as I go (the quilting), so I hope it turns out okay! I am a novice quilter (only made one for Olivia once and it was a baby quilt...)......
I have seen all those lovely vintage suitcase dollhouses on Pinterest and wanted to make one for Olivia's birthday. Never got around to it. A few days before we were leaving for Atlanta (which we never actually left for due to an emergency family situation) I decided to make this box for olivia to entertain herself with in the car. I did have a small vintage suitcase, but I thought it was a little too cumbersome for a car ride and went with this tea set box instead.
This was one of the funnest (not a word I know) projects I've made for her! I loved designing the felt landscape and the bedding, the furniture, everything. I also made a silk "princess" quilt for the bed, but that isn't pictured. I highly recommend making one if you have a young daughter. She now plays with it every time we go for a ride.
Above is the first side of a quilt I am making for bebe boy. I kept it simple so I could A. actually finish it B. actually finish it. I also used it to determine the color scheme for his room, which I hope I don't change my mind about in the next few months. Luckily I have 7 different colors in there, so I should be good (most of you might be wondering if I actually had a color scheme or just threw a bunch of colors on there and called it a day. I promise this was very thought out--and slightly determined by the fabric that was on sale at JoAnn's...). I am winging it as I go (the quilting), so I hope it turns out okay! I am a novice quilter (only made one for Olivia once and it was a baby quilt...)......
I have seen all those lovely vintage suitcase dollhouses on Pinterest and wanted to make one for Olivia's birthday. Never got around to it. A few days before we were leaving for Atlanta (which we never actually left for due to an emergency family situation) I decided to make this box for olivia to entertain herself with in the car. I did have a small vintage suitcase, but I thought it was a little too cumbersome for a car ride and went with this tea set box instead.
This was one of the funnest (not a word I know) projects I've made for her! I loved designing the felt landscape and the bedding, the furniture, everything. I also made a silk "princess" quilt for the bed, but that isn't pictured. I highly recommend making one if you have a young daughter. She now plays with it every time we go for a ride.
Monday, August 13, 2012
Little Boy Shirt Re-Vamp. (DIY)
For those that don't know... I found out I'm having a boy!! Yes, I have been a TERRIBLE blogger the past month, but there has been a whole lot going on in my life. Some good, some bad, but either way the blog is not as important as real life. You all with me? Anyway, when I found out I was having a boy I was not really surprised, since I thought I was having one anyway, BUT the reality of it set in once I saw that little guy up on the screen. I am having a boy. WHAT????
I know everyone thinks girls are "so much harder!.... so much drama.... " etc etc. I really resent those comments, being that A. I AM A GIRL. B. THE PEOPLE SAYING THIS ARE GIRLS!!!! what? Don't hate on your own sex! Anyway, I have loved having girls a ton. And I must say the thought of having a boy scared the crap out of me. Anyway, on to today's topic. BOY CLOTHES. Not alot of cute stuff out there. And the cute stuff is a little boring sometimes. I need my boy to wear some color, have something to compete with his sisters' clothes! Haha. So I bought a bag full of clothes from my neighbor and got to re-vamping some of them.
And now you can follow me on my journey towards making a cool wardrobe for my little boy. (Some homemade, some re-done.)
RE-VAMPING A BOY'S OXFORD SHIRT:
Materials needed:
bias tape (double fold)
possible: cool buttons
contrasting fabric that coordinates with buttons or bias tape (scrap)
ADDING NEW TRIM TO THE SHIRT:
1. open and attach your bias tape exactly how I did mine (if you have never sewn bias tape and are confused, google it, its simple) so that the tape is on the under part of the collar (the part that will actually end up on top when folded down), and the inside of the button hole side of the front of the shirt. Sew in the ditch. (DON'T FORGET TO FOLD YOUR ENDS UNDER.)
****** DO NOT SEW AT THE CORNER OF THE COLLAR, WHICH IS A RIGHT ANGLE. stitch up to the part where the fabric is folded and creased and then stop. Drag the fabric (without cutting the strings) to just after the corner onto the next section going down and begin sewing again. This is so important, because otherwise when you go to flip the bias tape over you won't be able to! There is probably another way to do this, but I don't know and this worked for me!
2. once you have finished sewing that, flip the rest of the bias tape over to the other side and secure with LOTS of pins.
3. Begin sewing on the part of the collar that will show when folded down (when its flipped up its the inside of the collar). When you get to the point where I drew an arrow (where the collar ends and the shirt front begins) backstitch and cut your strings. Begin sewing again on the TOP of the shirt/bias tape (the shirt front). This way all of the exposed parts of the bias tape look good where you have stitched!!!!
Done (with the bias tape part). You might like it just like that, or you might want to do more.... follow me.
CHANGING OUT THE POCKET:
Now its time to add a punch of color.
1. carefully use your stitch ripper to remove the original pocket. Undo the folds and lay it out on the new fabric.
2. trace or pin and then cut. (I didn't undo the top of the pocket, I just left extra room when I cut it, don't forget that part!!!)
3. Fold and sew down the top of the pocket (The part that will be left open to stick stuff in).
4. Take the new pocket and fold &iron the creases exactly like the old pocket.
5. Pin the new pocket onto the shirt in the exact spot as the old one! Sew! easy peasy.
Here are the 3 pieces I re-did and two (of the 5 I've already made) pairs of pants I made from old shorts and shirts of mine! I am in love with these boy clothes!
Here is the pattern/tutorial I used to make the pants, and here is one for larger pants. Seriously, pants are the easiest thing to make for your little ones! I had no idea!
And this is a super easy way to take those cheapy onesies (the ones with unfinished sleeve hems) and make them slightly hip-er:
I know everyone thinks girls are "so much harder!.... so much drama.... " etc etc. I really resent those comments, being that A. I AM A GIRL. B. THE PEOPLE SAYING THIS ARE GIRLS!!!! what? Don't hate on your own sex! Anyway, I have loved having girls a ton. And I must say the thought of having a boy scared the crap out of me. Anyway, on to today's topic. BOY CLOTHES. Not alot of cute stuff out there. And the cute stuff is a little boring sometimes. I need my boy to wear some color, have something to compete with his sisters' clothes! Haha. So I bought a bag full of clothes from my neighbor and got to re-vamping some of them.
And now you can follow me on my journey towards making a cool wardrobe for my little boy. (Some homemade, some re-done.)
RE-VAMPING A BOY'S OXFORD SHIRT:
Materials needed:
bias tape (double fold)
possible: cool buttons
contrasting fabric that coordinates with buttons or bias tape (scrap)
ADDING NEW TRIM TO THE SHIRT:
1. open and attach your bias tape exactly how I did mine (if you have never sewn bias tape and are confused, google it, its simple) so that the tape is on the under part of the collar (the part that will actually end up on top when folded down), and the inside of the button hole side of the front of the shirt. Sew in the ditch. (DON'T FORGET TO FOLD YOUR ENDS UNDER.)
****** DO NOT SEW AT THE CORNER OF THE COLLAR, WHICH IS A RIGHT ANGLE. stitch up to the part where the fabric is folded and creased and then stop. Drag the fabric (without cutting the strings) to just after the corner onto the next section going down and begin sewing again. This is so important, because otherwise when you go to flip the bias tape over you won't be able to! There is probably another way to do this, but I don't know and this worked for me!
2. once you have finished sewing that, flip the rest of the bias tape over to the other side and secure with LOTS of pins.
3. Begin sewing on the part of the collar that will show when folded down (when its flipped up its the inside of the collar). When you get to the point where I drew an arrow (where the collar ends and the shirt front begins) backstitch and cut your strings. Begin sewing again on the TOP of the shirt/bias tape (the shirt front). This way all of the exposed parts of the bias tape look good where you have stitched!!!!
Done (with the bias tape part). You might like it just like that, or you might want to do more.... follow me.
CHANGING OUT THE POCKET:
Now its time to add a punch of color.
1. carefully use your stitch ripper to remove the original pocket. Undo the folds and lay it out on the new fabric.
2. trace or pin and then cut. (I didn't undo the top of the pocket, I just left extra room when I cut it, don't forget that part!!!)
3. Fold and sew down the top of the pocket (The part that will be left open to stick stuff in).
4. Take the new pocket and fold &iron the creases exactly like the old pocket.
5. Pin the new pocket onto the shirt in the exact spot as the old one! Sew! easy peasy.
Here are the 3 pieces I re-did and two (of the 5 I've already made) pairs of pants I made from old shorts and shirts of mine! I am in love with these boy clothes!
Here is the pattern/tutorial I used to make the pants, and here is one for larger pants. Seriously, pants are the easiest thing to make for your little ones! I had no idea!
And this is a super easy way to take those cheapy onesies (the ones with unfinished sleeve hems) and make them slightly hip-er:
I just took the sleeves and rolled them inward and sewed them down to make a muscle shirt! Bring it on.
Wednesday, May 30, 2012
DIY Painted Leggings (Herringbone pattern)
This is the most simple pattern, and it takes no painting skills! Just some good eyes, and a foam brush. I even let Olivia help me with some of the lines!
MATERIALS:
Acrylic craft paint (1 or more colors--I used florescent pink martha stewart and gold (some other brand)
foam brush (Pay attention to wideness, as it will help you not have blank areas on the pants. you can do more rows with a narrower brush and less with a wider brush)
1. Put just the tip of the foam brush into the paint. Dab onto the leggings in a herringbone pattern (at a slight angle), one row at a time, changing direction with each row (and/or color).
2. let the first side dry and then turn over and do the other side!
I was inspired by these people. Seriously, its a husband and wife art school grad duo and if I had more money I would be all over their stuff (adult and kid).
Don't make my mistake and put lines near the crotch area.... err. oops. The super cool stays-in-place wired American Apparel knock-off headband she is wearing can be made using THIS tutorial!
Here is where a wider foam brush would've come in handy, so there wouldn't be that space on the butt. Not too big a deal, but if you are a perfectionist...
I think toddler and baby legs-slash-buns are the cutest things ever. And I love Olivia's new leggings! Okay now go make some for yourself, I know I will be.
MATERIALS:
Acrylic craft paint (1 or more colors--I used florescent pink martha stewart and gold (some other brand)
foam brush (Pay attention to wideness, as it will help you not have blank areas on the pants. you can do more rows with a narrower brush and less with a wider brush)
1. Put just the tip of the foam brush into the paint. Dab onto the leggings in a herringbone pattern (at a slight angle), one row at a time, changing direction with each row (and/or color).
2. let the first side dry and then turn over and do the other side!
I was inspired by these people. Seriously, its a husband and wife art school grad duo and if I had more money I would be all over their stuff (adult and kid).
Don't make my mistake and put lines near the crotch area.... err. oops. The super cool stays-in-place wired American Apparel knock-off headband she is wearing can be made using THIS tutorial!
Here is where a wider foam brush would've come in handy, so there wouldn't be that space on the butt. Not too big a deal, but if you are a perfectionist...
I think toddler and baby legs-slash-buns are the cutest things ever. And I love Olivia's new leggings! Okay now go make some for yourself, I know I will be.
Wednesday, May 9, 2012
DIY dotted kid shoes
Okay so this is not really a new tutorial for my blog, but the last one was so long ago that I thought I'd do a new post!
I saw the above photo on pinterest (of course....) but it happened to be from one of my favorite bloggers! Nina makes amazing things and clothes her adorablely Dutch daughter in AMAZING clothes. If there is one blogger out there who's child wardrobe I covet, it would be hers. hands. down.
Anyway, she has these shoes on her wish list. First thing I thought when I saw them was "dream kid shoes" and then next thing I thought was "I can make those polka dot ones." And so, after finding these pink pleather high top baby shoes at H&M I set out to make some "dream shoes!"
Materials:
Acrylic Paint (I used the art kind, but I think you can use house paint or craft paint as well)
paint brush or cotton ear swab!
1.paint the shoes. done.
I hand-painted mine and I think that A. I chose the wrong color (it dried much different than the burnt sienna it started out as) B. I should've used a cotton swab so the dots were all the same(ish) diameter. Oh well. I almost drove the 45 minutes back to H&M to get another pair and do it over and then realized I was just being silly and vain. So these will work fine. Can't wait for Amélie to fit into them!
I saw the above photo on pinterest (of course....) but it happened to be from one of my favorite bloggers! Nina makes amazing things and clothes her adorablely Dutch daughter in AMAZING clothes. If there is one blogger out there who's child wardrobe I covet, it would be hers. hands. down.
Anyway, she has these shoes on her wish list. First thing I thought when I saw them was "dream kid shoes" and then next thing I thought was "I can make those polka dot ones." And so, after finding these pink pleather high top baby shoes at H&M I set out to make some "dream shoes!"
Materials:
Acrylic Paint (I used the art kind, but I think you can use house paint or craft paint as well)
paint brush or cotton ear swab!
1.paint the shoes. done.
I hand-painted mine and I think that A. I chose the wrong color (it dried much different than the burnt sienna it started out as) B. I should've used a cotton swab so the dots were all the same(ish) diameter. Oh well. I almost drove the 45 minutes back to H&M to get another pair and do it over and then realized I was just being silly and vain. So these will work fine. Can't wait for Amélie to fit into them!
Wednesday, April 25, 2012
Easiest leather bracelet ever. DIY
I painted mine, but they are also beautiful left plain! This super duper simple leather cuff is made without glue, scissors (unless you want to cut it differently), sewing, or any hardware.
And let me give credit where it is due. I came up with this cuff while doing THIS tutorial from Freshly Picked which I absolutely fell in love with and became addicted to doing!
FIRST: Buy some of this tooling leather remnants from Tandy. (and I found a discount code online which made it the same price for me to get TWO of these bags for the price of one:)
SECOND: take out a long, slender, already cut strip of the leather.
THIRD: spray it with water or quickly run it under water in your sink.
FOURTH: curl it into a cuff, smaller than your wrist (but not SUUUPER small, duh). I used a straight bobby pin to keep mine in position, but its totally not necessary. Let it dry for 24 hours (if it feels moist at ALL then leave it, it still has more drying to do before its really set).
DONE! Except if you want to do what I did, and take some acrylic paints to them.
been wearing them every day.
Thursday, April 12, 2012
Cardboard Aquarium
This has nothing to do with the post, but here was our happy family (don't the girls look joyous?) on Easter. I had fun making the girls dresses this year and then trying to coordinate our outfits with the girls'. I didn't spend one penny on our Easter get-ups thank you! And I will tell you more about the girls' dresses later this week. For today's post, see below.
Just like yesterday's project, if pinterest had existed when I discovered Made by Joel (above), my boards would have been FULL with his projects. I love love love love his stuff. Here is another project I made inspired by one of his last year.
This was a joint project this time, not just something I made for Olivia. Again, I didn't actually look at his project when I made ours, I just went off of memory. For ours I got out some 140lb watercolor paper (the good stuff) and had olivia paint freely (she did make me paint a little) and I showed her how you can blow the paint which she thought was really fun. She glued on some pom-poms for rocks and then I assembled the rest (the fish can be moved from the top!!).
Pretty fun! Give it a try!
Wednesday, April 11, 2012
Spoon people
Before Pinterest was ever created I saw these spoon people on Fine Little Day. I would have pinned the crap out of them, had it existed. The idea was so cool though, that it stuck in the back of my brain and stayed there until 2 days ago when I finally made my own.
Hers are, of course, much cooler. BUT I wanted mine to have another function, which is to use them in our weekly (hopefully one day) "Family Home Evenings." SO I made one that represents Franc, me, Olivia, and Amélie. Yes, my art skills are much better than this, but I just wanted them to A. be fast (took me about 45 min.) B. not to have to look at any photos or blah blah C. not be stuck at their current age (I didn't want Amelie to forever look like a baby, or Olivia a toddler... so I just did their general features).
Anyway, I didn't look at Fine Little Day's spoons when I did them, but now I am thinking maybe I should paint some clothes, or put some fun little details. But really, since I have 4,697 more projects to get to (before someone make me make another headband), I probably will leave it at this.
Hers are, of course, much cooler. BUT I wanted mine to have another function, which is to use them in our weekly (hopefully one day) "Family Home Evenings." SO I made one that represents Franc, me, Olivia, and Amélie. Yes, my art skills are much better than this, but I just wanted them to A. be fast (took me about 45 min.) B. not to have to look at any photos or blah blah C. not be stuck at their current age (I didn't want Amelie to forever look like a baby, or Olivia a toddler... so I just did their general features).
Anyway, I didn't look at Fine Little Day's spoons when I did them, but now I am thinking maybe I should paint some clothes, or put some fun little details. But really, since I have 4,697 more projects to get to (before someone make me make another headband), I probably will leave it at this.
Tuesday, April 10, 2012
family memory game
I got this idea 2 years ago. I collected the baby food caps. But they sat there until yesterday when I decided to finally do it. Guess what? It only took about 30 minutes! It is simple, practically free, and my daughter already LOVES it.
+
Materials: hot glue (or other glue of choice), circle punch, baby food caps, photos with heads not too large (hard to find in my family of large noggins...).
I paid only the shipping of the photos for this project. I waited until I got one of those emails from shutterfly saying I could get 50 photos free or something like that. And of course the caps came from baby food. This can be great for kids learning the names of their aunts, uncles, cousins, etc but really it is just fun for them to think about and see them as they play the game! I also included some photos of Olivia with the princesses at disney world which she LOVES of course:)
1. punch the faces out
2 glue them
play memory.
(My inspiration came from seeing a family photo/faces fridge magnet diy and a babyfood jar cap memory game. I just put the two ideas together!. voila!)
Thursday, March 1, 2012
Petal Lamp Shade
I wrapped this lamp cord from Ikea about 2 months ago and it has been sitting in my kitchen waiting to be hung. I really wanted to go with an "industrial" look, but the cord with just a lightbulb was visually lost when hung in our high-ceilinged apartment. So I made a shade for the time being! I really have other plans for this cord in the future, but for now I think this looks great! Here's the tute:
Materials:
paper (newsprint or better)
flour
cold water
bowl
saran-wrap or press and seal
felt
hot glue
1. our about 1/2 cup of flour into a bowl (not the bowl you are molding the lampshade on!!). Using a wisk, place the bowl under a small stream of water and wisk vigorously to combine it with the flour. when you get sludgy/gluey consistancy (it will take very little water), you can turn it off and keep wisking until its smooth.
2. cover your bowl with the saran-wrap (I used press and seal, its sooo much better).
3. dip your pieces of paper into the flour sludge and remove the excess liquid with your fingers. place the pieces on the bowl, overlapping and covering it completely. do 2-3 layers
4. let dry overnight
5. cut a hole out of the top, big enough to JUST slip the plug through.
6. Cut a whole lot of "petals" from the felt (I used wool for the cream color and acrylic for the white). Mine were about 1.5 inches long.
7. hot glue them to the paper bowl, starting at the bottom and working your way up concentrically.
done!
I did hang it up, but couldn't get a good photo of it. I felt like you could see it better just sitting on the table:)
Here is my next papier maché project.... I am in super love with it but its not finished. I just wanted to give you a taste of what's to come:)
Materials:
paper (newsprint or better)
flour
cold water
bowl
saran-wrap or press and seal
felt
hot glue
1. our about 1/2 cup of flour into a bowl (not the bowl you are molding the lampshade on!!). Using a wisk, place the bowl under a small stream of water and wisk vigorously to combine it with the flour. when you get sludgy/gluey consistancy (it will take very little water), you can turn it off and keep wisking until its smooth.
2. cover your bowl with the saran-wrap (I used press and seal, its sooo much better).
3. dip your pieces of paper into the flour sludge and remove the excess liquid with your fingers. place the pieces on the bowl, overlapping and covering it completely. do 2-3 layers
4. let dry overnight
5. cut a hole out of the top, big enough to JUST slip the plug through.
6. Cut a whole lot of "petals" from the felt (I used wool for the cream color and acrylic for the white). Mine were about 1.5 inches long.
7. hot glue them to the paper bowl, starting at the bottom and working your way up concentrically.
done!
I did hang it up, but couldn't get a good photo of it. I felt like you could see it better just sitting on the table:)
Here is my next papier maché project.... I am in super love with it but its not finished. I just wanted to give you a taste of what's to come:)
Friday, January 20, 2012
Mark up your baby's legs
I thought I had this great idea. So I took out a sharpie (fine point) and started making little diamond shapes on Amélie's tights. Later that night I was coming up with a list of projects to do with my sister and low and behold, there were some DIY heart tights on some indie chick on my pinterest board. dang.
luckily, her tutorial is a little different, so I am going to go ahead and give you mine....
Materials:
sharpie, preferably fine tipped
tights stolen from your kid
your hand
1. Lay the tights on the floor, or put them on your kid. Put a fiiiiiine little dot where the center of each knee is. (I did this without my baby.)
2. draw yo' designs. I made mine asymmetrical, because I am an artist and that is how we do things. but symmetry is fine too, you choose:)
you are done. you can handwash if you are paranoid. I am not, since permanent marker never comes out of Olivia's clothes when I just stick it in the wash.....
luckily, her tutorial is a little different, so I am going to go ahead and give you mine....
Materials:
sharpie, preferably fine tipped
tights stolen from your kid
your hand
1. Lay the tights on the floor, or put them on your kid. Put a fiiiiiine little dot where the center of each knee is. (I did this without my baby.)
2. draw yo' designs. I made mine asymmetrical, because I am an artist and that is how we do things. but symmetry is fine too, you choose:)
you are done. you can handwash if you are paranoid. I am not, since permanent marker never comes out of Olivia's clothes when I just stick it in the wash.....
Thursday, October 20, 2011
If you didn't already... make this.
please excuse the grout. I live in an old apartment. can't get the stuff completely clean!! too lazy to photoshop it out:)
I just wanted to repost this tutorial because it is one of the simplest, easiest, most played with things I ever made for my daughter Olivia. I love how many ways she uses these foam shapes. I had only thought of them as being used to make art pieces in the bath/shower, but she sorts them by color, by shape, counts them, puts them on her arms, legs, and belly. The possibilities and educational opportunities are endless! See the old tutorial of mine here.
Wednesday, October 5, 2011
A little French: Pillowcase Dress tutorial
Yes, this is a pillowcase dress, so it is easy to make. But no one will even know you made it from a pillowcase when you are done! This project only takes about an hour, but looks like it took you for-ev-ah. And I kinda think it looks like French children's clothing (White, subtle detailing, a little nautical...) maybe I am just dreaming:)
Materials Needed:
Pillowcase (I chose one with a pretty hem)
paper (if you want to make a template of the collar before cutting it out of fabric)
scissors
sewing machine
Ribbon, button, or some kind of closure if desired (I didn't make one)
1. Cut your pillowcase to desired length. I made mine (the left part) long enough to go from Olivia's chest to her knees. You can measure your own chil'rens to see what size you need!2. Cut out a rectangle with a slit and a hole (this will be the collar) out of both layers of the top of the pillowcase. There is an opening, so the hole can be smaller than your kid's head... I made a template out of newsprint before I cut it out of the pillowcase. Should written down measurements for you all.
3. Fold under the top of the skirt portion of the dress, 2x, and then stitch, using the right side of your presser foot as the guide for your fabric (1/4 in??). I used a light blue contrasting thread for all my stitching.
4. either pleat and pin, or throw caution to the wind like I did, and pleat as your sew, all the way around. This part needs to be able to slip over their head and body and fit around the chest.
5. Sew around the rectangle/collar you cut out (1/4 in seam), leaving an opening on one of the sides.
6. Turn it right side out and top stitch two lines 1/8- 1/4 in. apart (if you want).
7. Pin the front part of the collar to your dress portion like above.
8. with the collar pinned to the dress, sew 3-4 more lines all around the collar (see below), each spaced abt. 1/8 in. apart.
9. pin the collar to the dress so that the top of the opening lines up with the top of the dress portion, and the bottom of the opening in the collar is overlapped with the dress. (see above)
10. As shown above, cut a slit
11. pin the bottom corners of the collar so that they overlap over the slit in the dress that you just cut.
12. Sew on top of the lines that you already made/sewed to attache the dress to the collar (both at the slit and on the left and right sides of the collar).
13. If you want, attach some sort of closure. I didn't. It doesn't need one! I went back and forth and back and forth about attaching linen tape (my mom's idea), ribbons made from the remnants of the pillowcase scraps, satin ribbon, velvet ribbon, blue fabric strips, a large button, a bow..... But in the end I decided I like it just as it was. Its not overdone.
oh and its already been worn, washed and dried here and so sorry, but not ironed. I'd just had a baby when I took these shots! (But I made the dress BEFORE the baby). Sorry. Iron the wrinkles out in your head please.
She was so happy she just couldn't stay still. So you aren't going to get some awesome photoshoot like everyone else does on their blogs. Sorry I really really tried. But this kid wouldn't stay still for two seconds!!!
Honestly it is gorgeous in person, but since it is white, it was really hard to photograph. Just trust me and go make one!
Subscribe to:
Posts (Atom)


I